Image banner in the cart
Add one or more promo images to the cart drawer, each with an optional link and its own position, from Cart Editor → Add a Module → + Add Another Widget → Image banner.
An Image banner is a picture you place inside the cart drawer, such as a sale banner, a free-shipping graphic or a new-collection teaser. You can make it clickable so it takes shoppers to a collection or page. Add as many banners as you need, each with its own image, link and position.
Where to find it: Oxify Cart Drawer → Home → Manage Cart Drawer → left menu Add a Module → + Add Another Widget → Image banner.
Add a banner
In the Cart Editor's left menu, scroll to Add a Module and click + Add Another Widget.
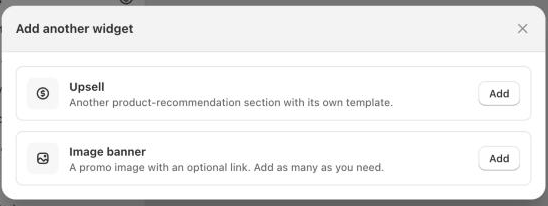
The Add another widget window opens with two choices: Upsell ("Another product-recommendation section with its own template.") and Image banner ("A promo image with an optional link. Add as many as you need."). Click Add next to Image banner.
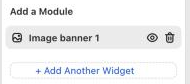
A new item, Image banner 1, appears in the left menu under Add a Module, and its settings open. A new banner is switched on (On) and placed After cart items.
Upload the image and fill in the other settings (below).
Check the live preview, then click Save in the bar at the top. The banner is only on your storefront after you save.
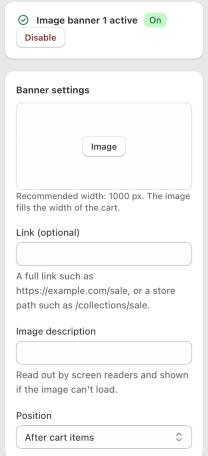
Banner settings
| Setting | What it does | Default |
|---|---|---|
| On / Off (top card) | Shows or hides this banner. Disable hides it without deleting it. | On |
| Image | The picture. Drop a file on the box or click it to upload. Help text: "Recommended width: 1000 px. The image fills the width of the cart." | Empty |
| Link (optional) | Where the banner takes shoppers when they tap it. Help text: "A full link such as https://example.com/sale, or a store path such as /collections/sale." Leave it empty for a banner that isn't clickable. | Empty |
| Image description | A short description of the image. Help text: "Read out by screen readers and shown if the image can't load." | Empty |
| Position | Where the banner sits: Above cart items, After cart items or Below cart items (details below). | After cart items |
A banner shows only when it's on and has an image. Until you upload one, nothing shows in the preview or on the storefront.
Link rules
The link must start with https:// (or http://), or be a path in your store that starts with /, such as /collections/sale or /pages/shipping. Anything else shows the error "Enter a link that starts with https:// or a path that starts with /. The banner won't be clickable until this is fixed." The banner still shows, but isn't clickable until you fix the link.
In the Cart Editor preview the banner is never clickable, so you don't leave the editor by accident. Test the link on your storefront.
Positions
| Position | Where the banner shows |
|---|---|
| Above cart items | Under the announcements and rewards bar, before the first cart item. |
| After cart items | Directly under the last cart item. |
| Below cart items | Lower down, after the sections that follow the cart items (such as upsells placed there), just before the checkout area. |
Banners only show when the cart has items. If several banners use the same position, they show in the order of the left menu.
Add more banners or delete one
- Click + Add Another Widget → Image banner again for each extra banner. They're named Image banner 1, Image banner 2 and so on in the left menu. An eye icon next to each name shows whether it's on.
- To delete a banner, click the bin icon next to its name. Confirm Delete image banner? ("This removes the banner and its settings. This cannot be undone until you discard your changes."). Until you save, Discard in the top bar brings it back.
Tips
- Use a wide, short image (for example 1000 × 250 px). Tall images push the cart items and the checkout button down, especially on phones.
- Keep the text on the image short and large: the cart drawer is narrow on phones.
- Always fill in Image description, for shoppers who use screen readers.
- An uploaded image is saved in your store's Content → Files. See File uploads.