
How to add custom CSS?
Add your own CSS to the Oxify Cart Drawer through the Cart Editor to restyle it beyond the built-in design settings.
This guide will help you add custom CSS to the IA Cart Drawer on your store. Follow the steps below:
Steps to Add Custom CSS:
-
Log in to your Shopify Admin Panel
-
Navigate to your store's admin dashboard.
-
Access the Oxify Cart Drawer App
-
Go to Apps in the left-hand menu.
-
Locate and open the Oxify Cart Drawer app.
-
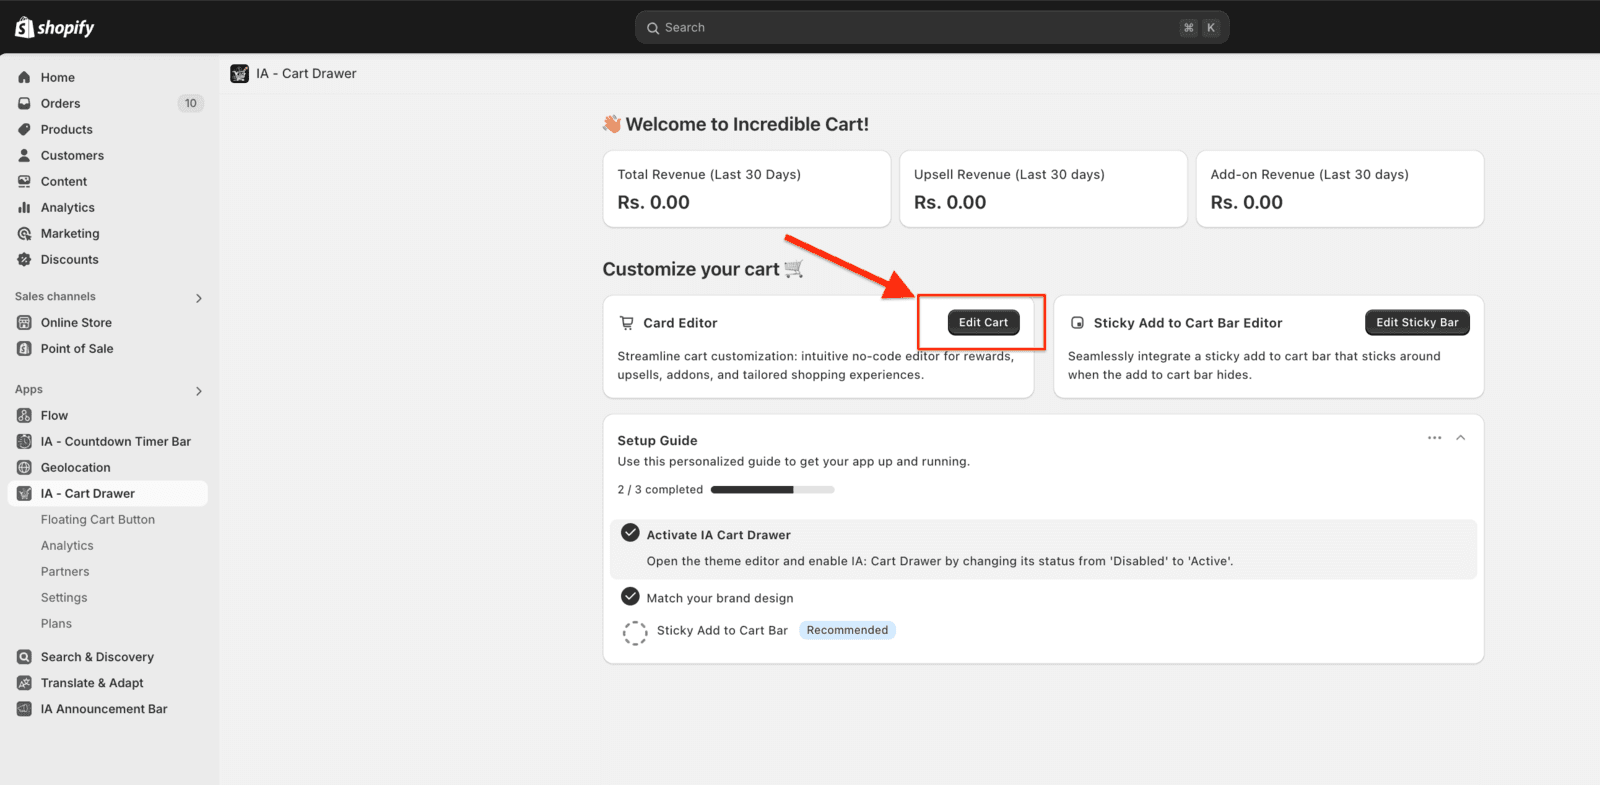
Open the Cart Editor
-
Inside the Oxify Cart Drawer app, find and click on the Cart Editor option.
-
Enable the Custom HTML & CSS Feature
-
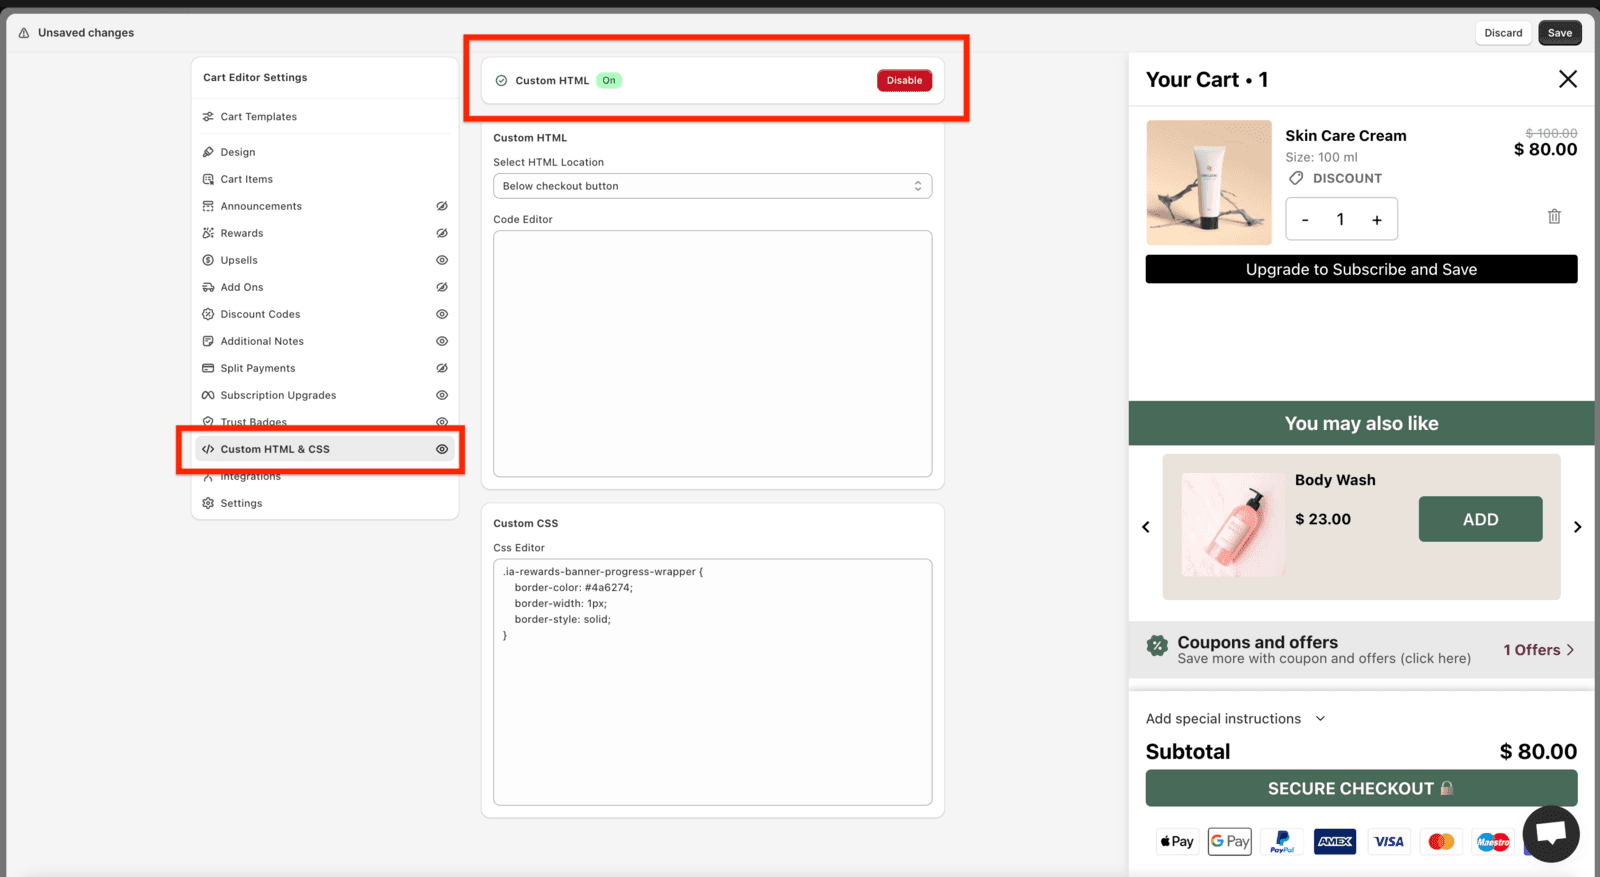
In the left-hand side panel, locate the option labeled Custom HTML & CSS.
-
Click on it to open the settings.
-
Toggle the feature ON to enable customization.
-
Add Your Custom CSS
-
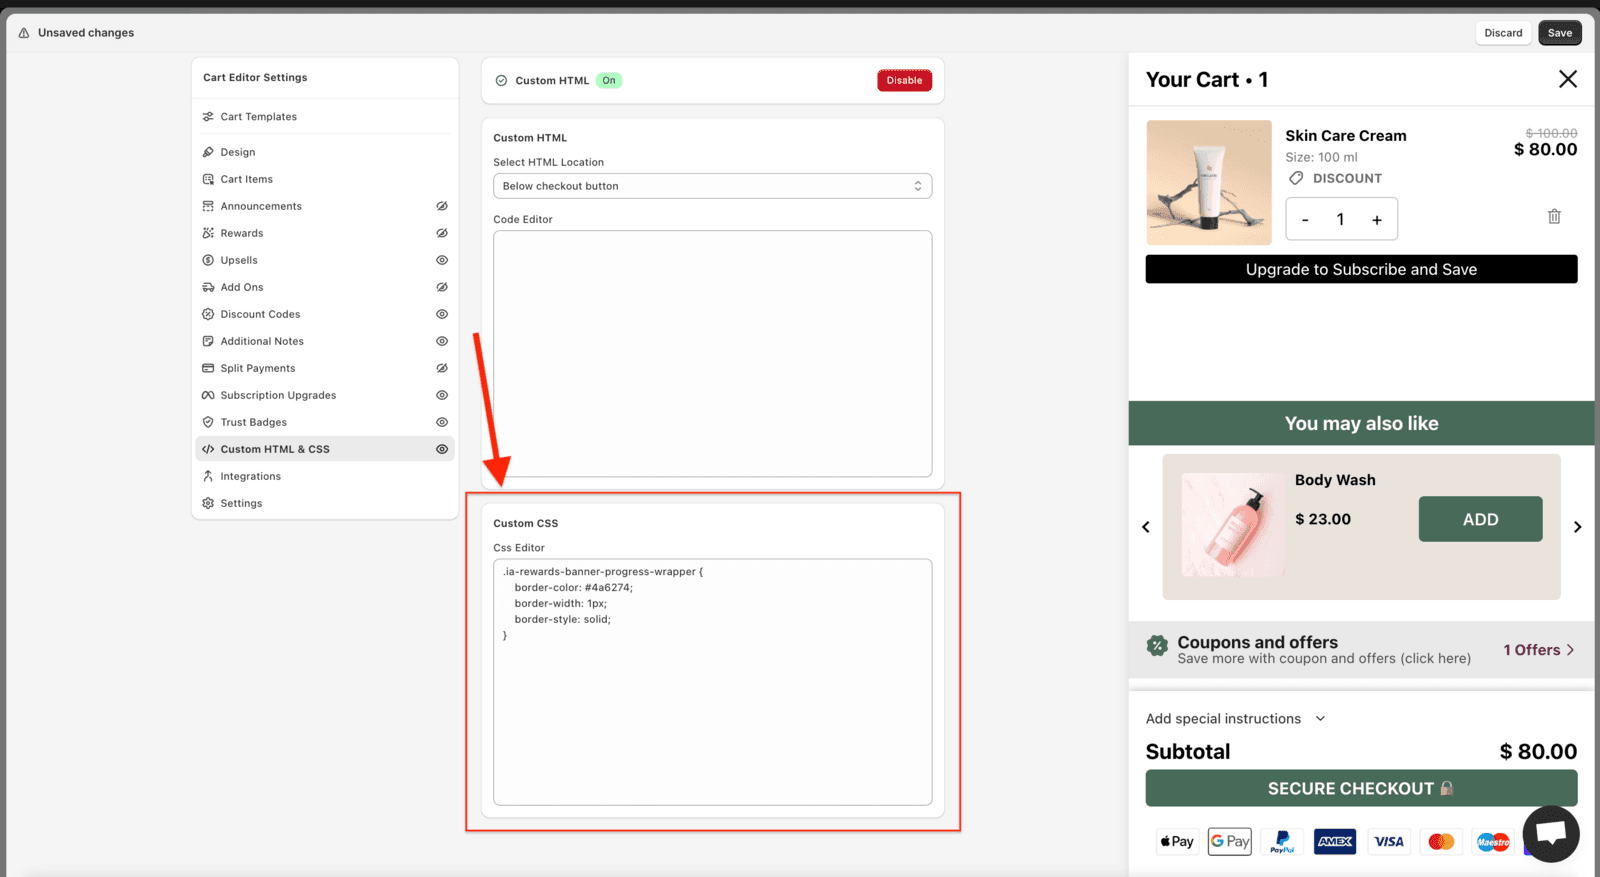
Once the feature is enabled, a text box labeled Custom CSS will appear.
-
Input your desired CSS code into this box.
-
Save Your Changes
-
After adding your custom CSS, click the Save button to apply the changes to your cart drawer.
Sample Code
Additional Notes:
- Ensure the CSS code is properly formatted to avoid errors.
- Refresh your storefront to verify that the customizations are applied successfully.
- If you encounter any issues, contact our support team for assistance.
This guide should help you customize the IA Cart Drawer to match your store's design seamlessly.