
Order notes and additional notes
A free-text field for delivery notes, gift messages, or special instructions.
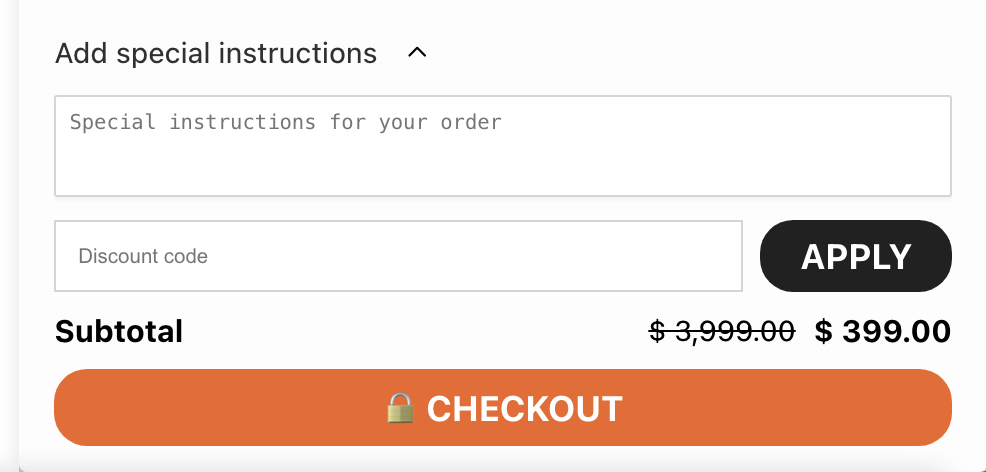
A free-text field where customers can add a delivery note or gift message. It shows as a collapsible section in the cart: the shopper clicks the title to open a text box. What they type is saved to the Shopify cart's note, which carries through to the order's note in your Shopify admin.
Set it up
- In the Oxify app, go to Home and click Manage Cart Drawer (or Set up Cart Drawer) on the Cart Drawer card to open the Cart Editor.
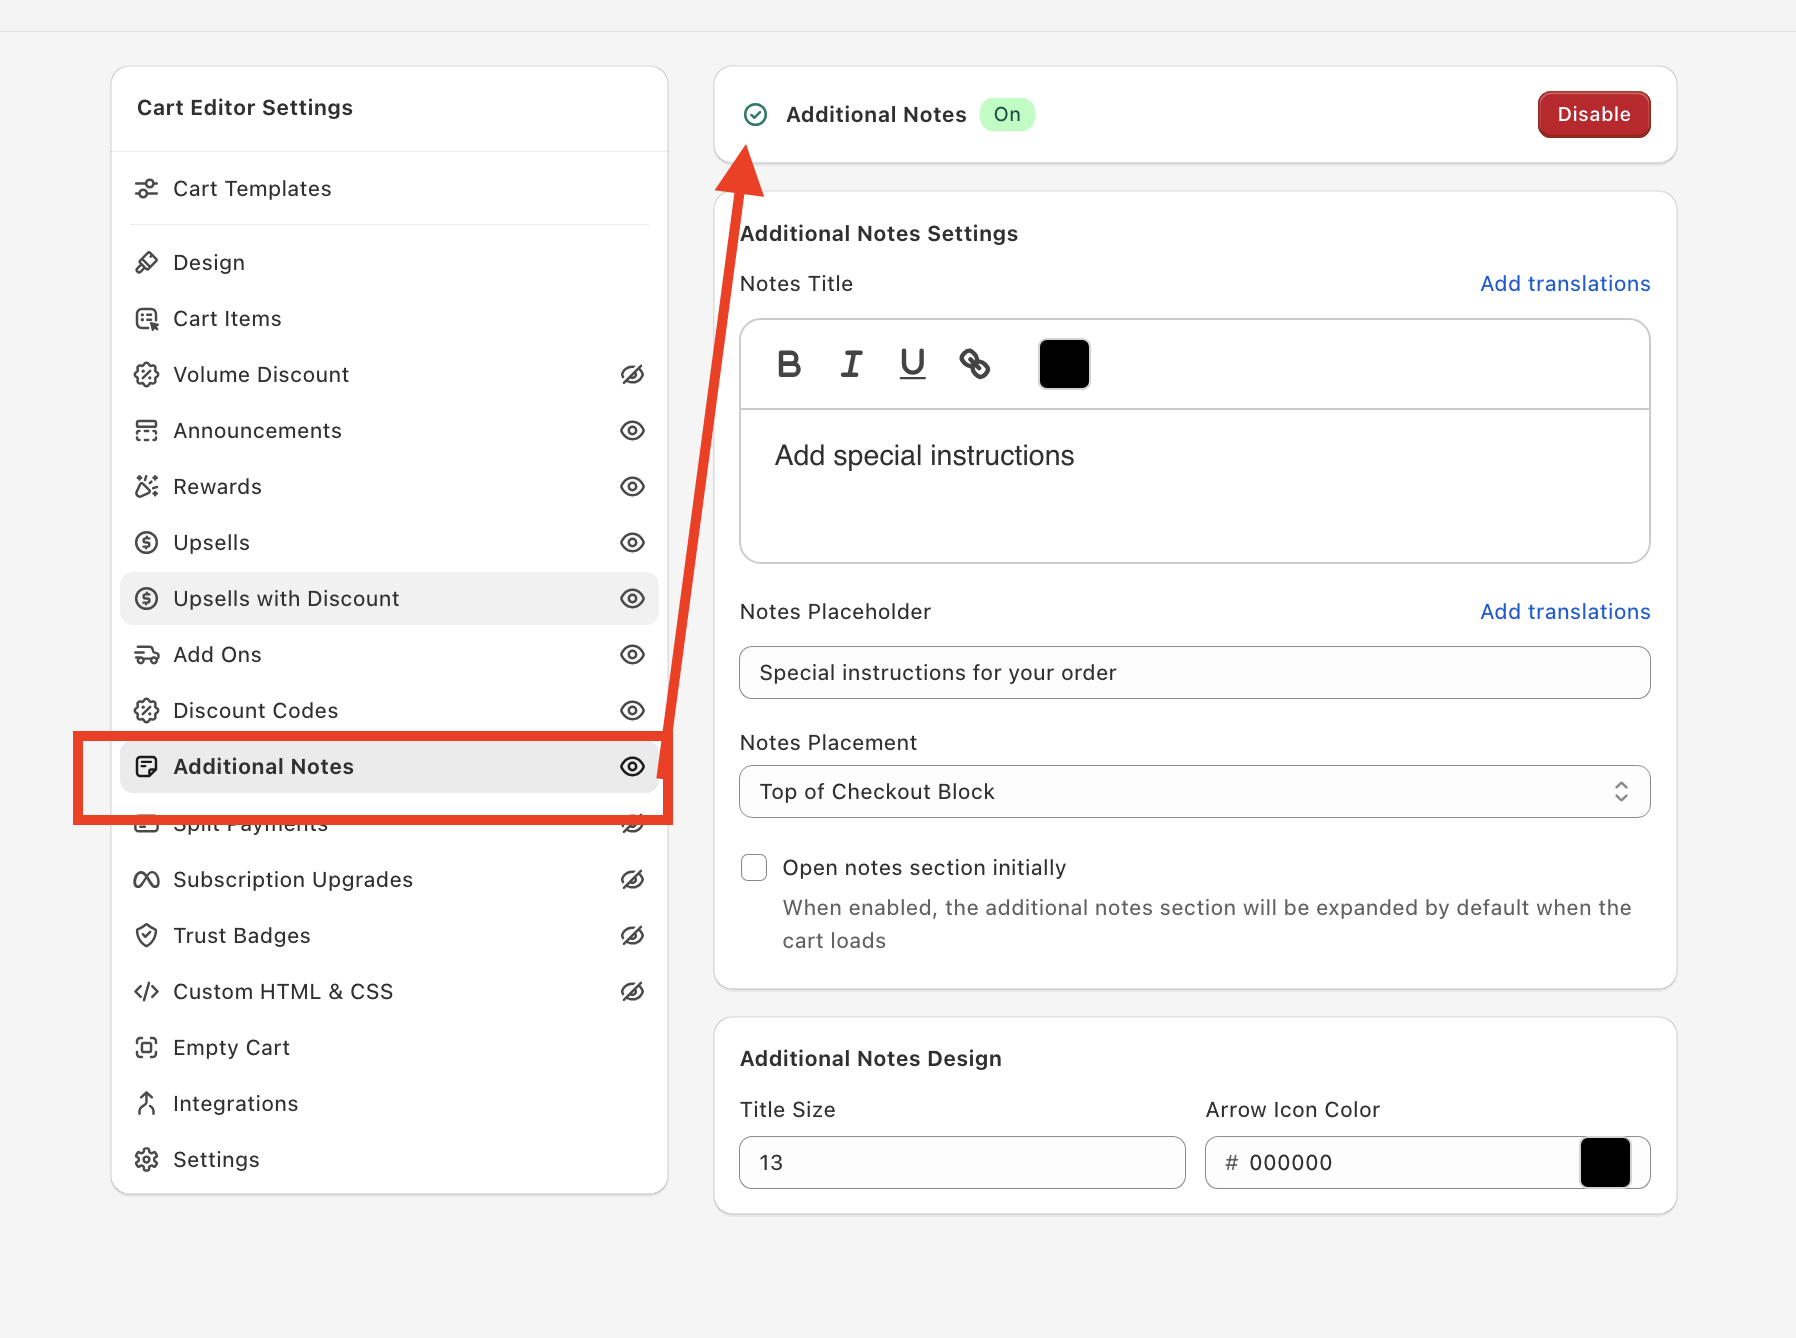
- In the Cart Editor's left sidebar, click Additional Notes.
- Click Enable at the top of the panel.
- In Additional Notes Settings, set the title, placeholder and placement (below).
- Optionally adjust Additional Notes Design, then click Save.
Configuration
Notes Title
The clickable title of the section (default "Add special instructions"). Use a clear, intent-specific label:
- "Order notes" — generic.
- "Gift message" — perfect for gifting stores.
- "Delivery instructions" — useful for furniture, large items, or doorman buildings.
It's a rich-text field with Add translations for other languages.
Notes Placeholder
Hint text that disappears when the customer starts typing (default "Special instructions for your order"). Example: "e.g. Leave with neighbor at #4B."
Notes Placement
- Top of Checkout Block (default) — The note sits in the checkout area at the bottom of the drawer, above the discount field. Higher visibility, more notes captured.
- Below Cart Items — The note sits under the cart items and scrolls with them. Cleaner but easy to miss.
Open notes section initially
Tick this to have the section expanded when the cart loads, so the text box is already visible. It's off by default.
Design
Additional Notes Design has two controls: Title Size (px) and Arrow Icon Color (the chevron next to the title).
Custom template (advanced)
If you have React (JSX) skills, you can replace this section's built-in layout with your own template. The Custom template card appears at the bottom of this panel only after you tick Enable custom template editors under Settings → Custom templates in the Oxify app and save. It needs technical skills, and our support team can't help debug custom templates.
See Custom templates for how to turn the editors on and the props each template receives.