
Discount code field in the cart
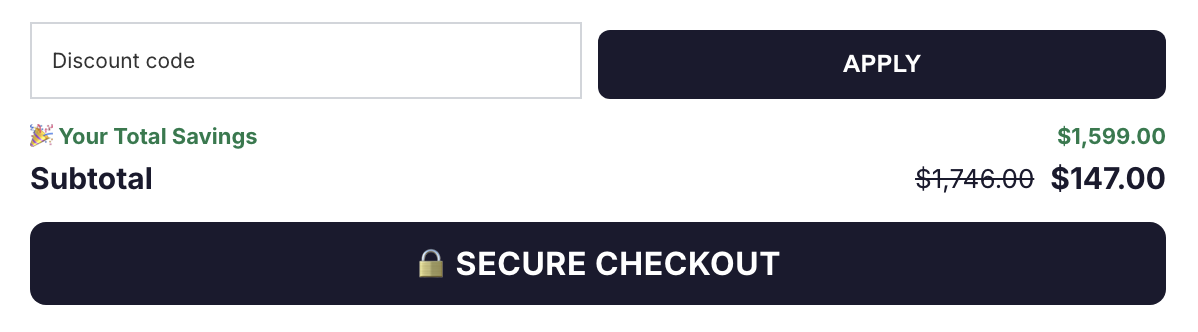
Enable the discount code field in the cart drawer — choose Basic mode (input field only) or Advanced mode to let shoppers browse and apply a list of your codes from a Coupons and offers panel.
The discount codes feature lets customers enter promo codes inside the cart drawer without leaving for checkout. In Advanced mode, you can also add a Coupons and offers banner that opens a list of your codes right inside the cart — so customers don't bounce to Google searching for "[your store] discount code".
Open Cart Editor → Discount Codes to configure it. (Discount Codes is a direct sidebar item — not nested under Settings.)
Step 1: Open Discount Codes in the Cart Editor
In the Oxify app, go to Home and click Manage Cart Drawer (or Set up Cart Drawer) on the Cart Drawer card. In the Cart Editor's left sidebar, click Discount Codes.
[Screenshot: Cart Editor sidebar showing Discount Codes selected]
The eye icon next to a sidebar item shows whether the feature is currently enabled (visible eye = on, crossed-out eye = off).
Step 2: Enable Discount Codes
At the top of the panel, click the Enable button to turn the feature on. When enabled, the header reads Discount Codes active with an On badge and a red Disable button next to it.
[Screenshot: Discount Codes header showing "On" status with Disable button]
Step 3: Read the Discount limitations note
Below the toggle, you'll see a yellow notice titled Discount limitations. Click Show More to expand it.
The notice explains that the cart drawer offers a streamlined discount experience that may not handle everything Shopify's standard checkout supports. It lists these cases:
- Multiple discount codes — the cart supports several automatic discounts at once, but the notice says it can only accommodate one manual code at a time; customers with several codes are pointed to checkout.
- Free shipping discounts — the notice says these aren't supported in the cart; customers apply them at checkout.
- Shopify Plus stores using
checkout.liquid— the notice says the discount code module is hidden from the storefront there. Stores on checkout extensibility aren't affected.
What this means in practice: test each kind of discount you plan to use in the cart drawer before launching a major sale. Anything the cart can't apply can still be entered at Shopify checkout.
Step 4: Pick your Discount Type — BASIC or ADVANCED
This is the most important choice. The Discount Type toggle has two options:
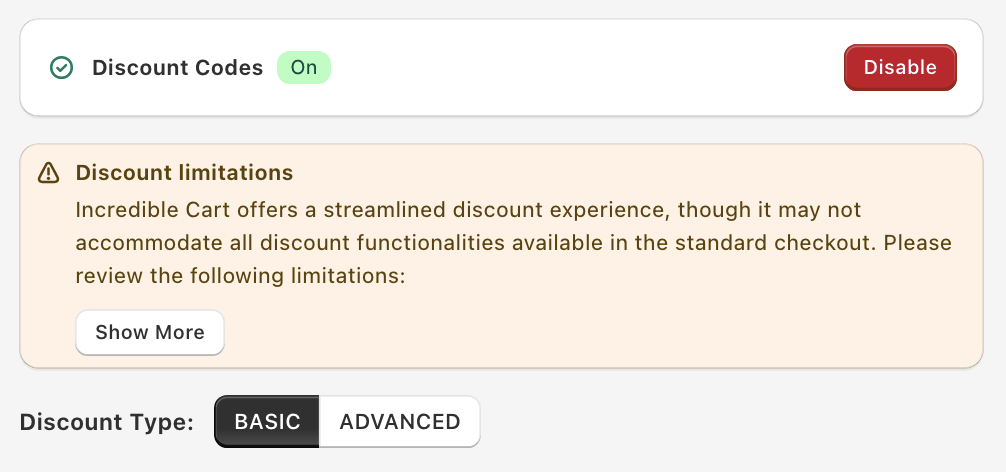
- BASIC — A simple input field where customers type in a discount code and click Apply. Use this if you mostly run automatic discounts and just want to support the occasional code-bearing customer.
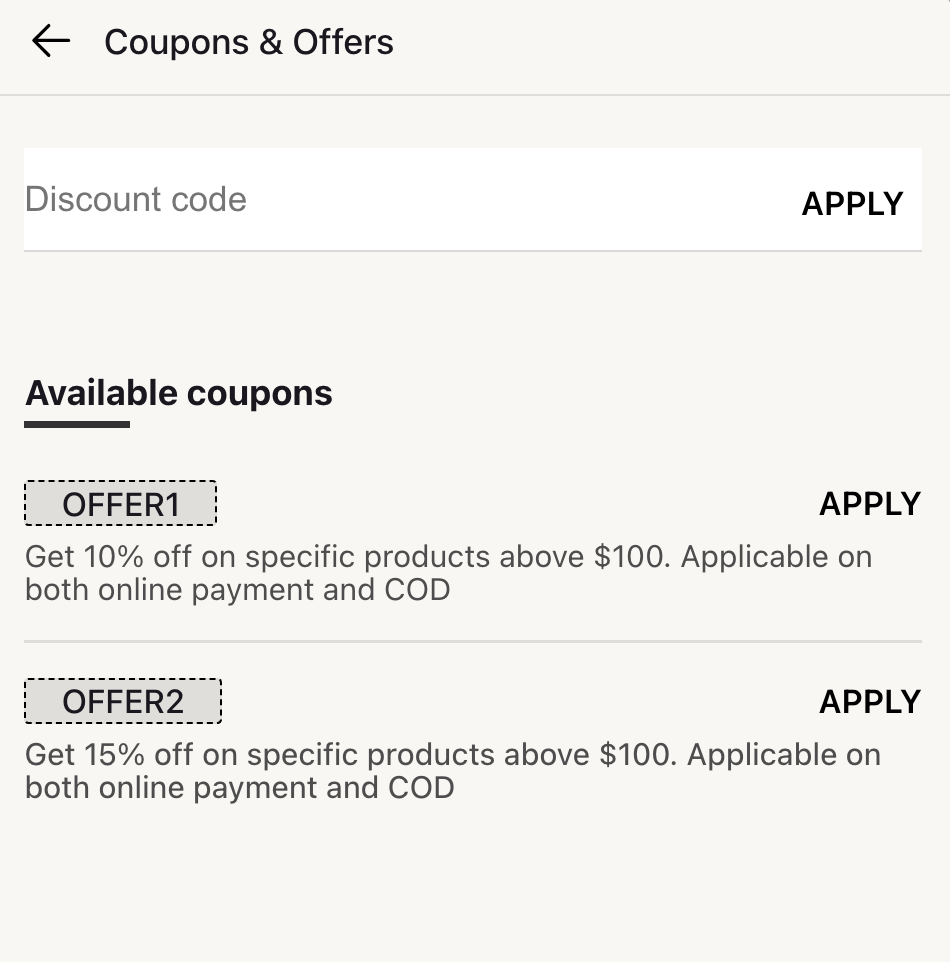
- ADVANCED — Adds a Coupons and offers banner to the cart. Tapping it opens a panel with a code field plus the list of codes you've added, each with its own apply button. Use this when you want to actively promote specific codes (clearance code, first-time-buyer code) without making customers type anything.
The Advanced mode is what customers usually mean when they ask "how do I show all my discount codes inside the cart?" — it puts your codes in one tappable place so customers don't have to hunt for them elsewhere.
Step 5: Configure Discount Code Settings
Below the Discount Type toggle, the Discount Code Settings panel handles the input field text. Both modes share these two fields:
- Discount Input Placeholder (default: "Discount code") — the greyed-out hint text inside the input field before customers type. You can change this to "Promo code", "Enter your code here", "Have a code? Enter it", etc.
- Discount Apply Button Text (default: "APPLY") — the text on the button next to the input field. Common alternatives: "Apply Code", "Add", "Use", "Redeem".
Click Add translations in the top-right of either field to add per-language overrides for international stores.
Step 6: Style the Apply button (Basic mode)
In Basic mode, the Discount Code Styles panel controls how the Apply button looks. (In Advanced mode this panel is hidden — the banner is styled under Coupons and Offers Settings below.) It has five fields:
- Text Color — hex color (default
#FFFFFF, white). The color of the "APPLY" text on the button. - Font Size (px) — default 18. Size of the button text. 14–18px works for most carts.
- Font Weight — dropdown (default Bold), from Thin to Black. Bold reads better on small buttons.
- Button Radius (px) — default 5. Controls corner rounding. 0px gives sharp corners, 4–8px feels modern, 15–20px gives a pill-button look.
- Button Background Color — hex color (default
#000000, black). Set this to your primary brand color so the Apply button feels native to your store.
If you're keeping things simple, the defaults (white text on black, bold, 5px radius) work for most stores. Match the colors to your checkout button so the cart drawer feels visually unified.
Advanced mode — offer a list of codes in the cart
If you switched the Discount Type to ADVANCED, additional fields and cards appear. This is where you set up the Coupons and offers banner and the list of codes it opens.
Available coupons Title
Default: "Available coupons". The header shown above your list of codes inside the panel. Alternatives: "Today's offers", "Available discounts", "Promo codes for you", "Save with these codes".
Coupon not applicable text
Default: "Coupon not applicable to items in cart". The error message shown when a code a customer types or taps can't be applied to their cart (e.g. a footwear-only code on a t-shirt cart). Keep this short and clear — long error messages are ignored on mobile.
Make Coupon and Offer Component Sticky
When checked, the Coupons and offers banner stays pinned in the checkout area at the bottom of the drawer. When unchecked (the default), it sits at the end of the cart contents, just above that area, and scrolls with the items. Uncheck if you'd rather keep the cart minimalist and let the banner scroll out of view.
Coupons and Offers Settings
This card styles the banner: Background Color, Icon Size, Icon Color, plus the text and style of its Title (default "Coupons and offers"), Subtitle (default "Save more with coupon and offers (click here)"), and Offer Count (default {{offers_count}} Offers, where {{offers_count}} becomes the number of codes in your list).
List of Discount Codes Settings — adding the actual codes
This is the section that controls which codes actually appear inside the cart. Click the black Add Discount Code button to add a new code to the list.
Important: the codes you list here have to be real Shopify discount codes you've already created in Shopify admin → Discounts. Listing a code that doesn't exist in Shopify will show the customer a code they can tap, but it won't apply because Shopify will reject it.
Each code gets an Offer block with:
- Coupon Code — the actual code. It is case sensitive and has to match the code in your store.
- Reward Description — a short description shown with the code (e.g. "10% off your first order"). It's a rich-text field with Add translations for other languages.
You can add multiple codes — one per offer you want to surface. The first offer can't be deleted; the others have a delete button. Common picks: a first-time-buyer code and a seasonal sale code.
Step 7: Save and test
Save your changes, then open your storefront in incognito and add a product to the cart. In Basic mode, the discount input should appear in the checkout area at the bottom of the cart drawer. In Advanced mode, the Coupons and offers banner should appear — tap it to see the code field and your configured codes.
Test each code — type or tap each one and verify the discount applies correctly to the cart total. Applied codes are listed above the field with an ✕ to remove them. If a code "won't apply", check Shopify admin → Discounts → (the code) → Combinations to make sure it's not blocked by combination rules with another active discount.
Which mode should I use?
- Use BASIC if you mostly run automatic discounts and only occasionally hand out codes (e.g. customer service makeups, influencer codes). Customers who have a code can enter it; customers who don't won't see distracting offer banners.
- Use ADVANCED if you actively promote specific codes (clearance, first-time-buyer, holiday sale, abandoned cart recovery) and want customers to see them inside the cart. This often increases conversion because customers who would've abandoned to "find a code" instead see the codes you'd want them to use.
- Turn the whole feature off if you only run automatic discounts and don't issue any codes at all. A visible empty discount field can hurt conversion by signalling "you should be looking for a code somewhere".
Custom template (advanced)
If you have React (JSX) skills, you can replace this section's built-in layout with your own template. The Custom template card (with Basic input, Advanced banner, and Advanced sheet tabs) appears at the bottom of this panel only after you tick Enable custom template editors under Settings → Custom templates in the Oxify app and save. It needs technical skills, and our support team can't help debug custom templates.
See Custom templates for how to turn the editors on and the props each template receives.
In Advanced mode, only surface codes you actually want most customers to use. Listing your "VIP25" code publicly defeats the purpose of having a VIP code. The point of the in-cart list is to capture customers who would otherwise leave to search for a discount — so show them the codes you'd be happy for them to find anyway.