
Recent purchase popup
Show a small recent purchase card in the corner of your store. Write the text, set how often it appears, publish it, and check it on your storefront.
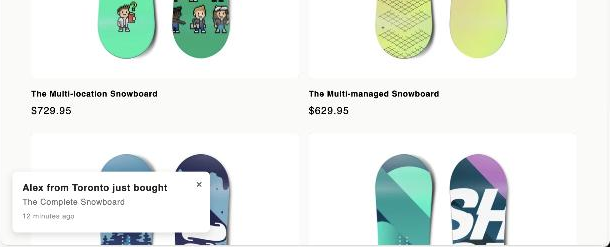
In this recipe you add a small card to the bottom-left corner of your store. It carries a message such as "Alex from Toronto just bought The Complete Snowboard" and a "12 minutes ago" line. A sales popup is not a countdown timer. It shows a card for a few seconds, then leaves. Use it for social proof or a short announcement.
Where to find it: Oxify Countdown → Sales Popups → Create Sales Popup
The popup shows the words you type
A sales popup does not read your orders. It shows exactly the heading and text you write, to every shopper who matches your rules. Write only messages that are true, such as a real recent order, or another message such as a shipping offer. The timestamp text is fixed too: 12 minutes ago stays as typed. Use wording that stays true, such as Today.
What you'll build
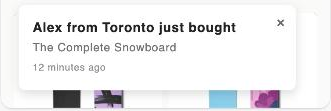
On a computer the card sits in the bottom-left corner over the page. It has a bold first line, a second line, a lighter timestamp line and a close button.
On a phone the card sits at the bottom left of the screen, unless you set separate phone settings.
Before you start
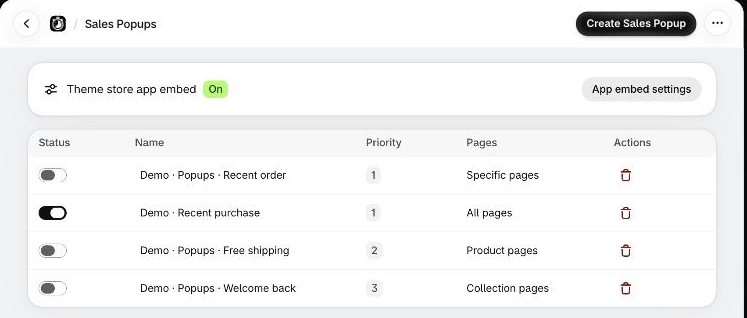
Check that the app embed is on. A popup travels with the app embed, so it can't show while the embed is off. The Sales Popups page shows Theme store app embed with an On or Off badge. See Enable the app embed. You don't add an app block for a popup, so there is no theme step in this recipe.
Settings at a glance
Use these values as they are, or swap in your own words.
| Where in the editor | Field | Value |
|---|---|---|
| Top of the editor | Popup name | Recent purchase |
| Status | Draft while you build, then Published | |
| Content & media | Heading text | Alex from Toronto just bought |
| Content text | The Complete Snowboard | |
| Pop-up link | Empty | |
| Make the whole popup clickable | Off | |
| Show a timestamp line | Ticked | |
| Timestamp text | 12 minutes ago, typed in | |
| Image URL | Empty | |
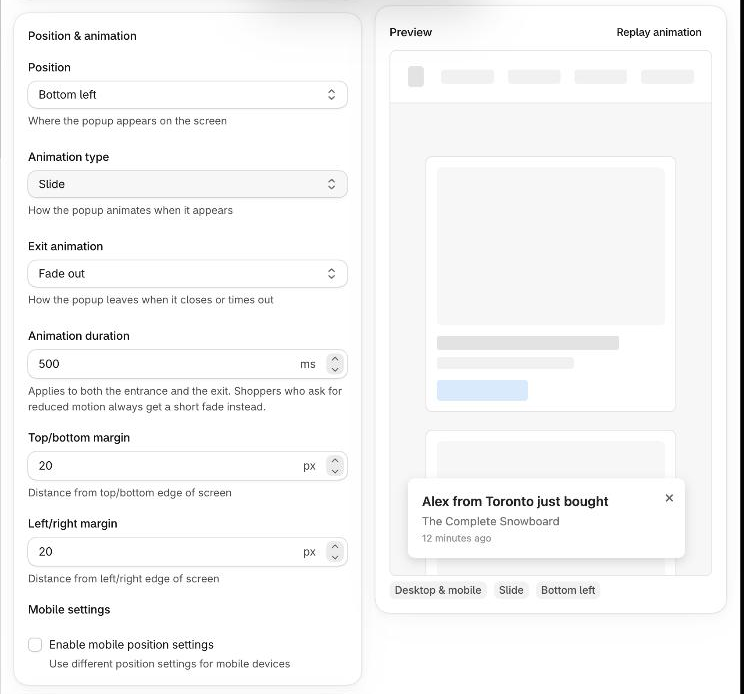
| Position & animation | Position | Bottom left |
| Animation type | Slide | |
| Exit animation | Fade out | |
| Animation duration | 500 ms | |
| Top/bottom margin and Left/right margin | 20 px each | |
| Design & styling | Everything | Leave the defaults |
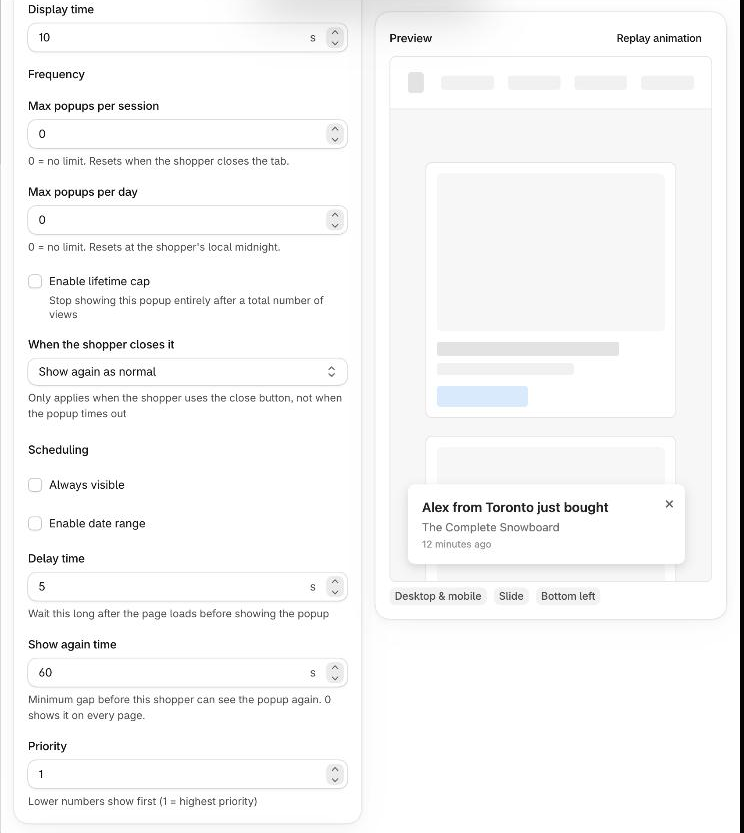
| Timing & scheduling | Display time | 10 s |
| Delay time | 5 s | |
| Show again time | 60 s | |
| Priority | 1 | |
| Targeting & visibility | Show on pages | All pages |
Why Delay time and Show again time are not 0
A new popup starts with Delay time and Show again time at 0. It then appears on every page load, for 10 seconds each time. That is fine for a quick test and tiring for shoppers on a real store. This recipe uses 5 and 60. See Popup scheduling and frequency.
Build the popup
Open Sales Popups. In the app, open Sales Popups from the left menu. Check that Theme store app embed shows On. Click Create Sales Popup. The Sales popup editor opens in a window over the page. See What are sales popups and Create a sales popup.
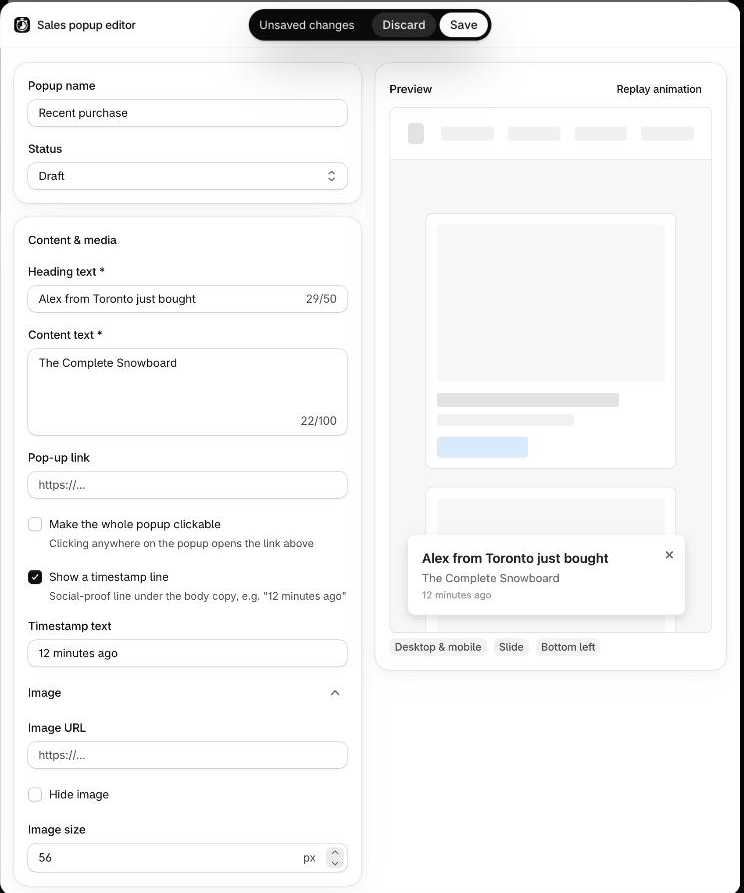
Name it and write the message. In the Content & media card, fill in these fields. Popup name is your own label. Shoppers never see it. Heading text takes up to 50 characters and Content text up to 100. Both are required.
- Popup name:
Recent purchase - Heading text:
Alex from Toronto just bought - Content text:
The Complete Snowboard - Show a timestamp line: tick it, then type
12 minutes agoin Timestamp text.
The grey 12 minutes ago in the Timestamp text box is only a hint. If you leave the box empty, the popup shows no timestamp line. Leave Pop-up link, Make the whole popup clickable and the Image settings alone for now. See Popup content.
Check the corner. Scroll to the Position & animation card. A new popup starts with the settings this recipe uses: Position on Bottom left, Animation type on Slide and Exit animation on Fade out. Leave them. If a chat bubble or a cookie banner already sits in that corner, pick another corner or raise Top/bottom margin. See Popup position and animation.
Set how long and how often it shows. Scroll to the Timing & scheduling card. Keep Display time at 10. Set Delay time to 5, which waits 5 seconds after a page loads. Set Show again time to 60, which keeps the same shopper from seeing it again for a minute. Leave Priority at 1. See Popup scheduling and frequency.
Leave the design and the audience alone. In Design & styling, the popup is a white card with dark text, 316 px wide. In Targeting & visibility, Show on pages is All pages, so the popup can appear on every page of your store. See Popup design and Popup targeting.
Save, then publish. Click Save in the Unsaved changes bar at the top of the editor. The message Sales popup saved as draft shows and a Publish button appears. The popup is saved but not live. Click Publish.
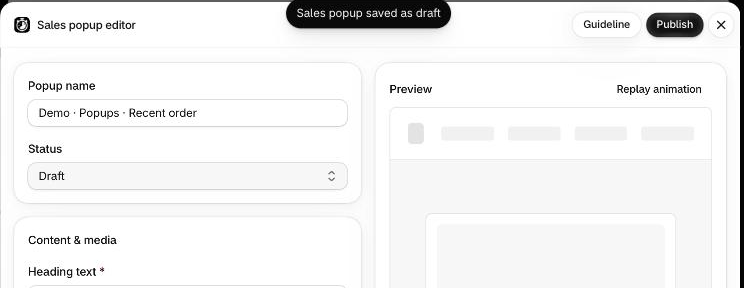
The message Sales popup published successfully shows, the Publish button goes away and Status changes to Published. See Manage sales popups.

Check it on your store
A popup reaches a shopper only when all of these are true: the app embed is on, the popup is Published, and the shopper matches your rules, such as the page and the frequency limits.
In the app, open Sales Popups. The switch in the Status column for Recent purchase should be on.
Open your store in a private browser window. The app remembers in the shopper's browser how often a popup was shown and whether it was closed, so a private window starts clean. If your store is still password protected, you see the password page first.
Open any page and wait. After about 5 seconds the card slides in at the bottom left. It stays for 10 seconds and then fades out.
Open another page right away. The card does not come back until 60 seconds have passed.
Make it your own
- Make it a link. Type a page of your store in Pop-up link, such as
/products/the-complete-snowboard, and tick Make the whole popup clickable. The link does nothing until you tick the box. - Add a product photo. Paste the web address of a picture in Image URL. The picture is always a square, from 30 to 200 px, and starts at 56 px.
- Use another corner. Set Position to Bottom right, Top left or Top right.
- Limit how often it shows. In Timing & scheduling, set Max popups per session or Max popups per day, or choose what happens in When the shopper closes it.
- Show it on some pages only. In Targeting & visibility, set Show on pages to Homepage, Product pages, Collection pages, Cart page or Specific pages.
If it doesn't show
Work through these first, then read Sales popup not showing.
- The app embed is off. The Theme store app embed row on the Sales Popups page should say On.
- The popup is a draft. Its switch in the Status column is off. Click Publish in the editor, or turn the switch on.
- You are on a page the popup does not cover. Check Show on pages in Targeting & visibility.
- It is waiting or resting. Delay time makes it wait after the page loads, and Show again time keeps it away after it has shown. Use a private window to start clean.