
Schedule publishing
Set the date and time a timer appears on its own, and optionally the date it disappears. Works for every timer type.
Schedule publishing lets you build a timer ahead of time and have it appear and disappear by itself. Use it for a sale that begins at midnight, or a campaign that should end on a set day.
Where to find it: Oxify Countdown → Create timer → Content tab → Publishing
The Publishing card is on the Content tab of every timer type, cart page timers included. It answers "when is this timer on my store at all?". The Timing card answers a different question: what is the clock counting down to?
Schedule a timer
Open the timer editor and stay on the Content tab. Scroll to the Publishing card.

Tick Schedule publishing. A Publish at date appears. The app fills in tomorrow at the current time. Click the date to pick a day, then set the hour, the minutes and AM or PM.
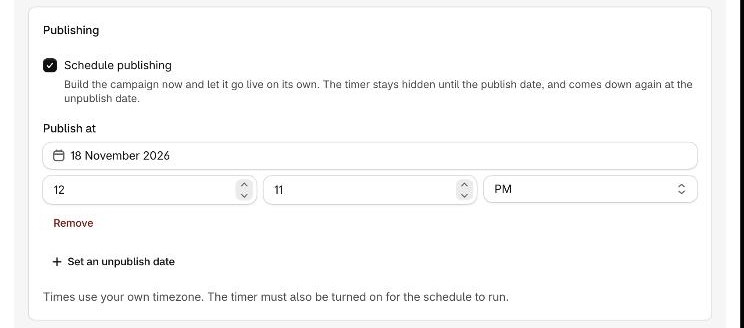
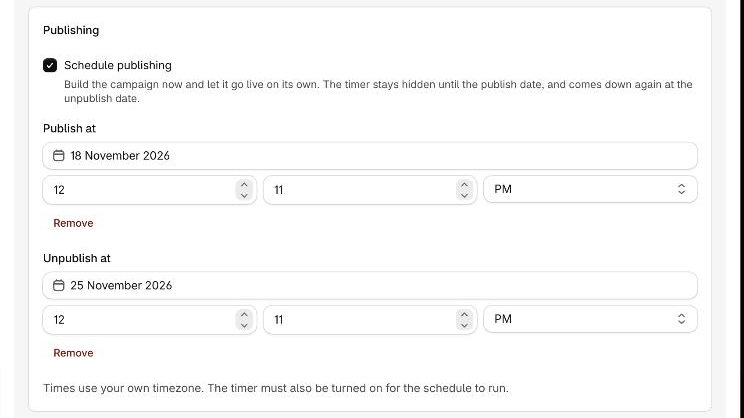
Optional: click Set an unpublish date to hide the timer on a date too. An Unpublish at date appears, set to 7 days after Publish at. Change it to the date you want.
Click Save, and make sure the timer is turned on: its switch in the timer list is on, and the editor header shows Unpublish rather than Publish. A timer that is turned off never shows, whatever its dates.
Click Remove under a date to clear it. With no Publish at, the timer shows as soon as it is turned on. With no Unpublish at, it stays on your store until you turn it off.
Times use your own time zone
The app reminds you with Times use your own timezone. The timer must also be turned on for the schedule to run. The time zone is the one your browser is set to. Every shopper sees the timer appear and disappear at the same moment.
When the timer needs only a publish date
If the timer is a Countdown to a date and Once Timer Ends is Hide Timer From User, the timer already disappears at its end date. The Publishing card then asks only for Publish at and says so: This timer comes down on its own when the countdown ends, so it only needs a publish date.
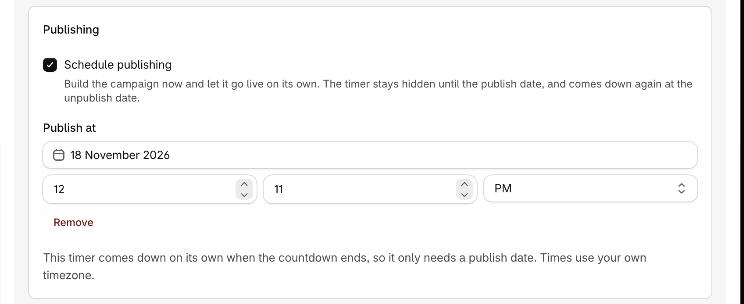
Choose another Once Timer Ends option, such as Show Custom Title or Do Nothing, and Set an unpublish date comes back. If you switch a Countdown to a date to Hide Timer From User while an Unpublish at date is set, the app removes that date.
See the status in your timer list
In the timer list on your dashboard, the badge in the Published column shows where each timer stands.
| Badge | What it means |
|---|---|
| Published | The timer is on, and now is inside its schedule (or it has no schedule). |
| Scheduled | The timer is on and is waiting for its Publish at date. |
| Ended | The timer is on, but its Unpublish at date has passed. |
| Unpublished | The timer's switch is off. Its dates are ignored. |
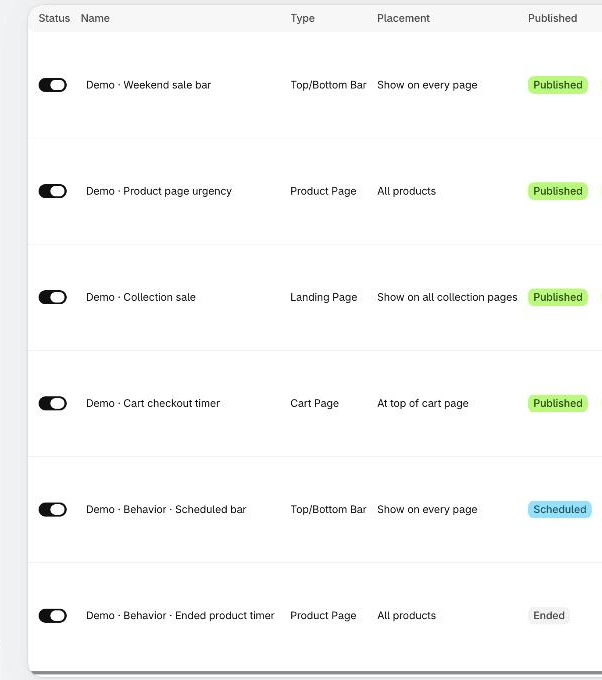
The status is worked out when the dashboard loads, so reload the page to see a change.
Reuse an Ended timer
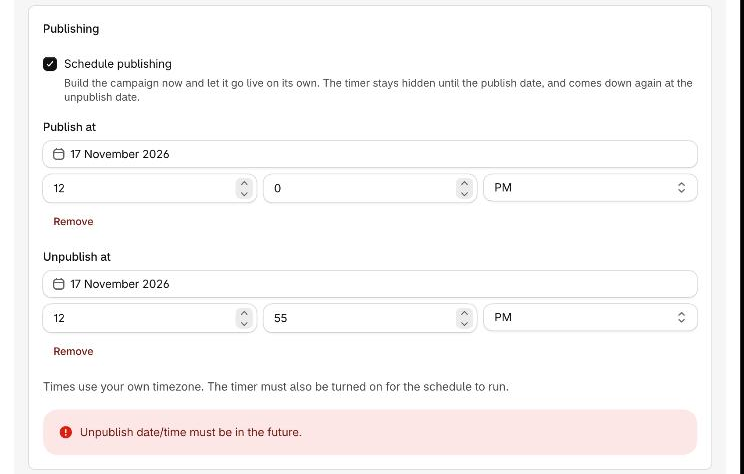
An Ended timer keeps its switch on, but shoppers no longer see it. To run it again, open the timer and change Unpublish at to a later date, or click Remove under it. Until you do, the app refuses to save the timer and shows Unpublish date/time must be in the future.
The editor header says Live
The badge in the editor header only says Live (the timer is turned on) or Draft. A timer that is waiting for its publish date still shows Live there. Check the timer list for Scheduled and Ended.

How it works
Each time a page of your store loads, the shopper's browser compares the current time with your dates and shows or hides the timer. This means:
- The timer appears and disappears at the time you set, with no delay.
- A shopper who already has a page open sees the change on the next page they open.
- The timer must still be placed in your theme and the app embed must be on. The schedule only decides when a placed timer is shown.
Example: a Black Friday timer built ahead of time
- Create a Top/Bottom Bar timer and choose Countdown to a date.
- Set Ends At to the end of Cyber Monday.
- Under Publishing, tick Schedule publishing and set Publish at to Black Friday, 12:00 AM.
- Leave Once Timer Ends on Hide Timer From User, so the bar comes down by itself at the end date.
- Click Save and turn the timer on. It shows Scheduled in your list until Black Friday starts.
Using it with a daily recurring timer
A Daily recurring timer repeats every week. Add Publish at and Unpublish at to limit it to a campaign. The daily window then only runs on the ticked days that fall between the two dates.
Messages you may see
The app checks the dates as you change them and shows a red message at the bottom of the Publishing card. These messages also stop a save.
| Message | When it appears | What to do |
|---|---|---|
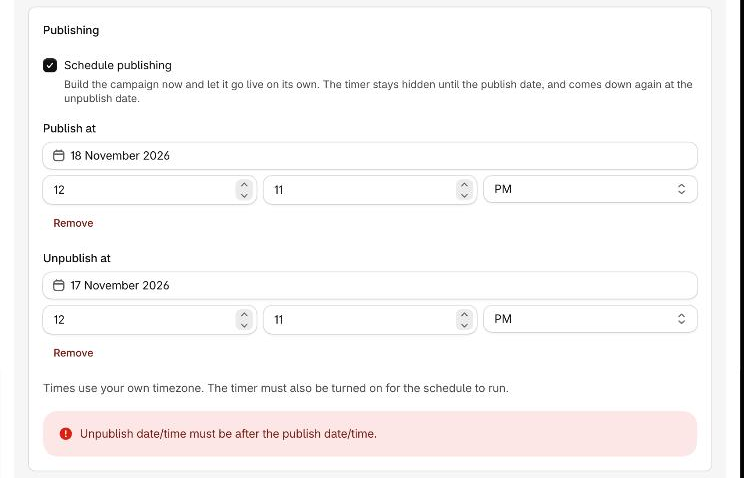
| Unpublish date/time must be after the publish date/time. | Unpublish at is the same as or earlier than Publish at. | Move Unpublish at later, or move Publish at earlier. |
| Unpublish date/time must be in the future. | Unpublish at has already passed. Saving it would hide the timer at once. | Pick a later date, or click Remove. |
| Publish date/time is invalid. | The app can't read the publish date. | Pick the date again from the calendar. |
| Unpublish date/time is invalid. | The app can't read the unpublish date. | Pick the date again from the calendar. |
A Publish at date that is already in the past is allowed. The timer then shows as soon as it is turned on.
Next
- Countdown to a date
- Once the timer ends
- Manage your timers: turn timers on and off from the list.