
Custom CSS
Add your own CSS when the built-in design settings aren't enough.
The Custom CSS card on the Design tab lets you write CSS that applies to your announcement bar. Use it for anything the design settings don't cover — custom animations, responsive tweaks, or matching a specific theme detail.
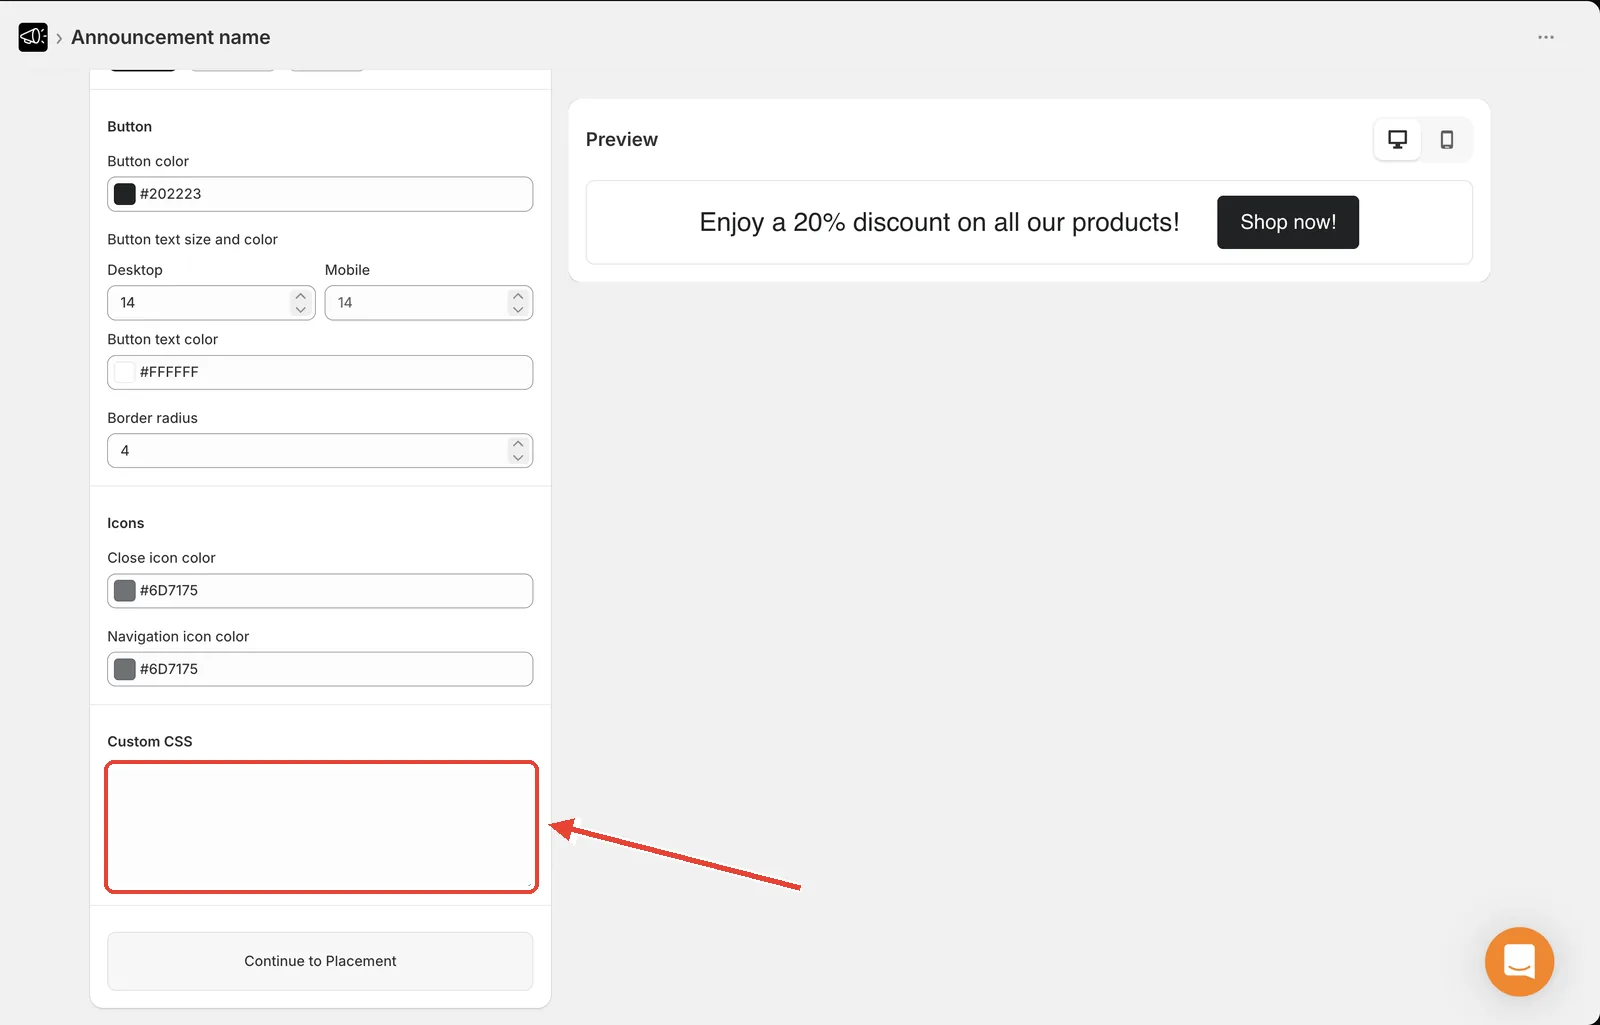
Add custom CSS
Open the announcement and go to the Design tab.
Scroll to the Custom CSS card.
Type or paste your CSS into the field.
Click Save.
Open your storefront and confirm it applied.
Example: hide the bar on very small screens
Example: add a subtle shadow
The second CSS field, in the theme editor
There's a second place to add CSS: the app embed itself has an Announcement Bar Custom CSS field. Its help text reads Paste any custom CSS here. It will apply to this announcement bar only.
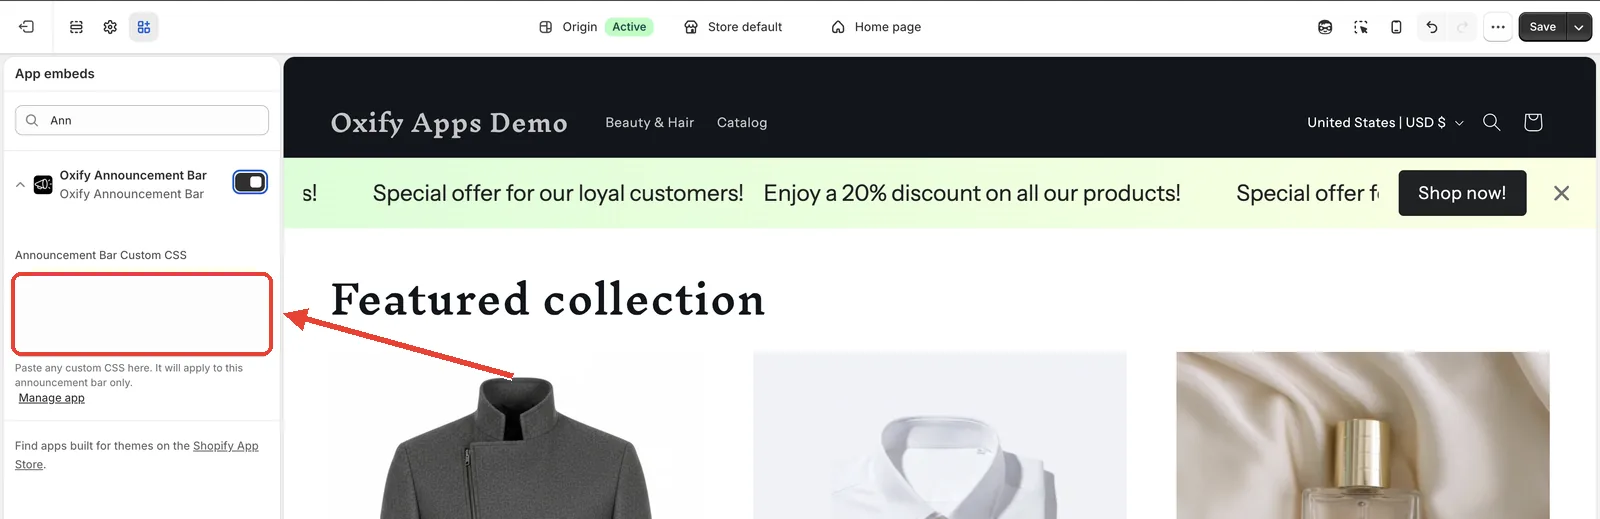
Go to Online Store → Themes → Customize.
Open the App embeds panel and expand Oxify Announcement Bar.
Paste your CSS into Announcement Bar Custom CSS.
Click Save.
Which field should you use?
| Use the Design tab field | Use the theme editor field |
|---|---|
| Styling that belongs to one announcement | Styling that should apply per theme |
| It travels with the announcement | It stays with the theme, not the announcement |
Prefer the Design tab field. It keeps the styling attached to the announcement it belongs to, so duplicating or reviewing that announcement shows the whole picture in one place.
If a rule isn't behaving as you expect, check both fields. CSS left in the theme editor from an earlier campaign is easy to forget about, and it keeps applying to whatever bar renders next.
Find the right selector
Open your storefront in Chrome or Firefox.
Right-click the part of the bar you want to style and choose Inspect.
Read the class name from the highlighted element.
Write your rule against that class.
Custom CSS is applied as written. A malformed rule can break the bar's layout or hide it entirely. Test on your storefront right after saving, and keep a copy of the CSS that last worked.
Tip
Try the built-in design settings first. Anything you do with Custom CSS has to be maintained by hand — the design settings survive template changes and app updates.
Templates never overwrite your Custom CSS. You can switch templates freely and your CSS stays in place.