
Scheduling
Set start and end dates so a bar appears and disappears on its own.
Scheduling lets a bar switch itself on and off — useful for flash sales, seasonal campaigns, and anything with a deadline. The Scheduling card is on the Content tab.
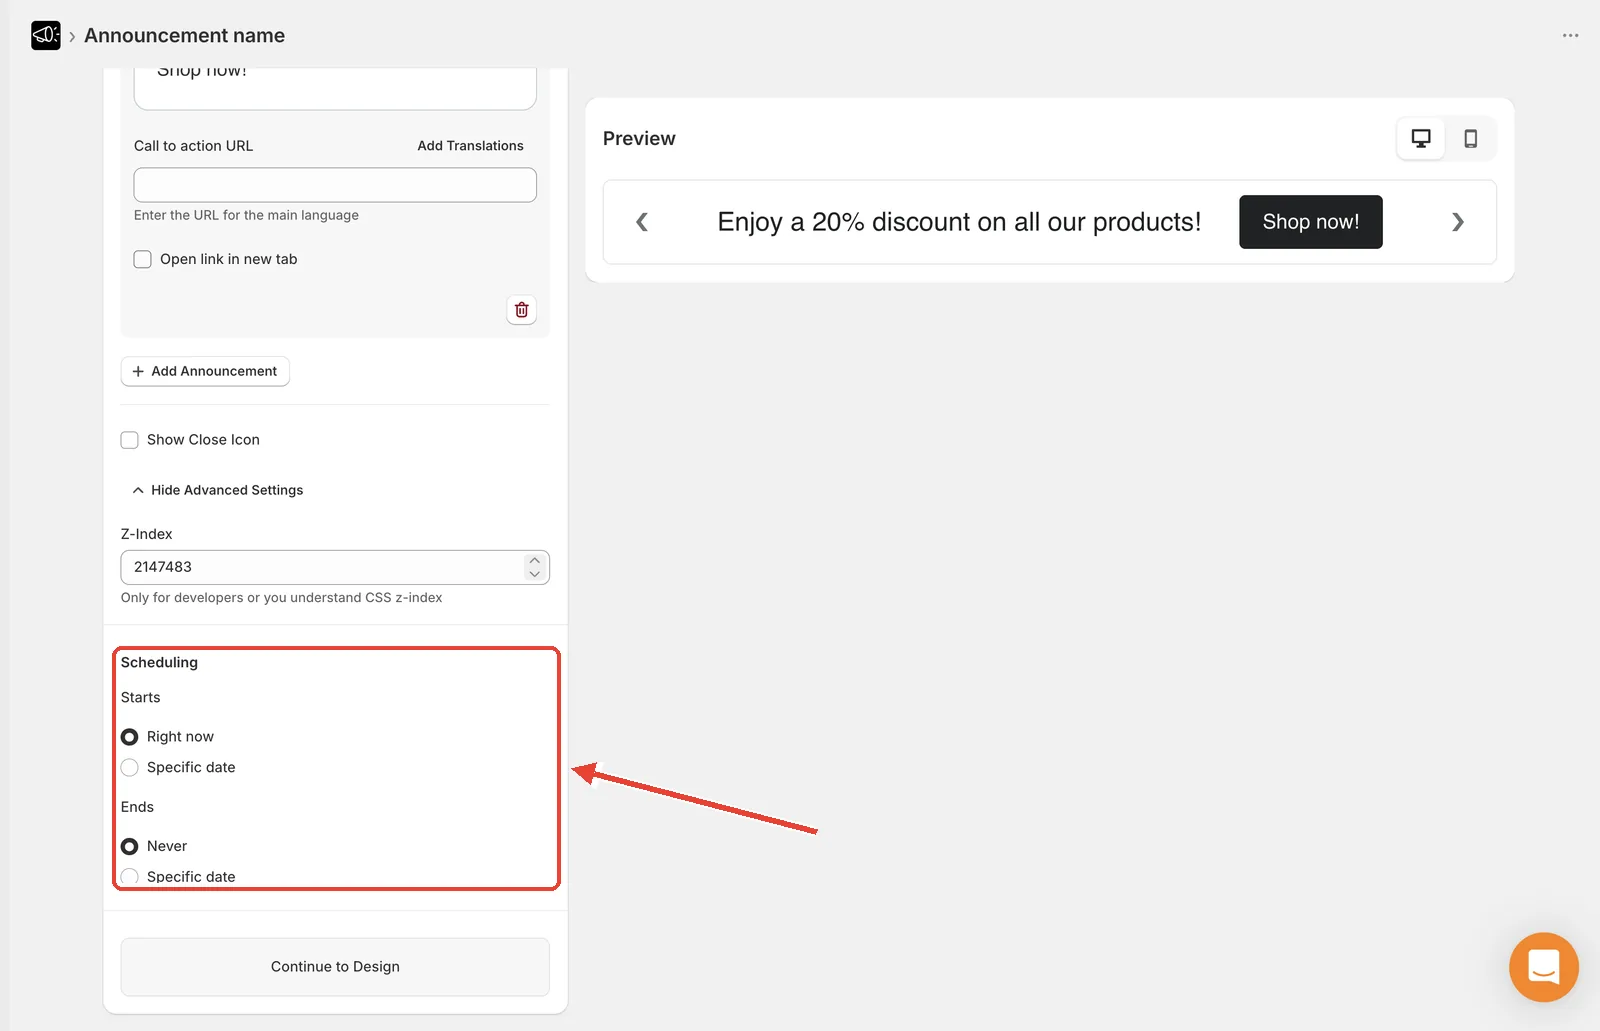
Start immediately
Open the Content tab and scroll to Scheduling.
Under Starts, select Right now.
Click Save. The bar goes live as soon as you publish it.
Start at a specific time
Under Starts, select Specific date.
Pick the start date from the date picker.
Set Hours, Minutes, and AM/PM.
Click Save, then Publish. The bar stays hidden until the start time arrives.
Run indefinitely
Under Ends, select Never.
Click Save.
The bar runs until you unpublish it manually. This is the right setting for permanent messages like shipping information.
End at a specific time
Under Ends, select Specific date.
Pick the end date.
Set Hours, Minutes, and AM/PM.
Click Save. The bar hides itself once that time passes.
Common patterns
| Campaign | Starts | Ends |
|---|---|---|
| Free shipping notice | Right now | Never |
| Weekend flash sale | Specific date — Friday 9:00 PM | Specific date — Sunday 11:59 PM |
| Black Friday | Specific date | Specific date |
| Holiday shipping cutoff | Specific date — Dec 1 | Specific date — Dec 20 |
Publish it too
A schedule only works on a published announcement. If the bar is left unpublished, the start time passes and nothing happens.
Tip
Schedule the start an hour or two early and check your storefront when it fires. That gives you time to fix a typo before your customers see it.