
Create your first builder
Build a working 'build your own box' page from scratch.
We'll build a gift box: customers choose 6 or 10 items from two categories and save as they go up in size.
1. Create the builder
Click Bundle Builder in the app sidebar.
Click Create Bundle Builder. The editor opens with three tabs — Builder Settings, Products, Design — and a live preview.
2. Name it
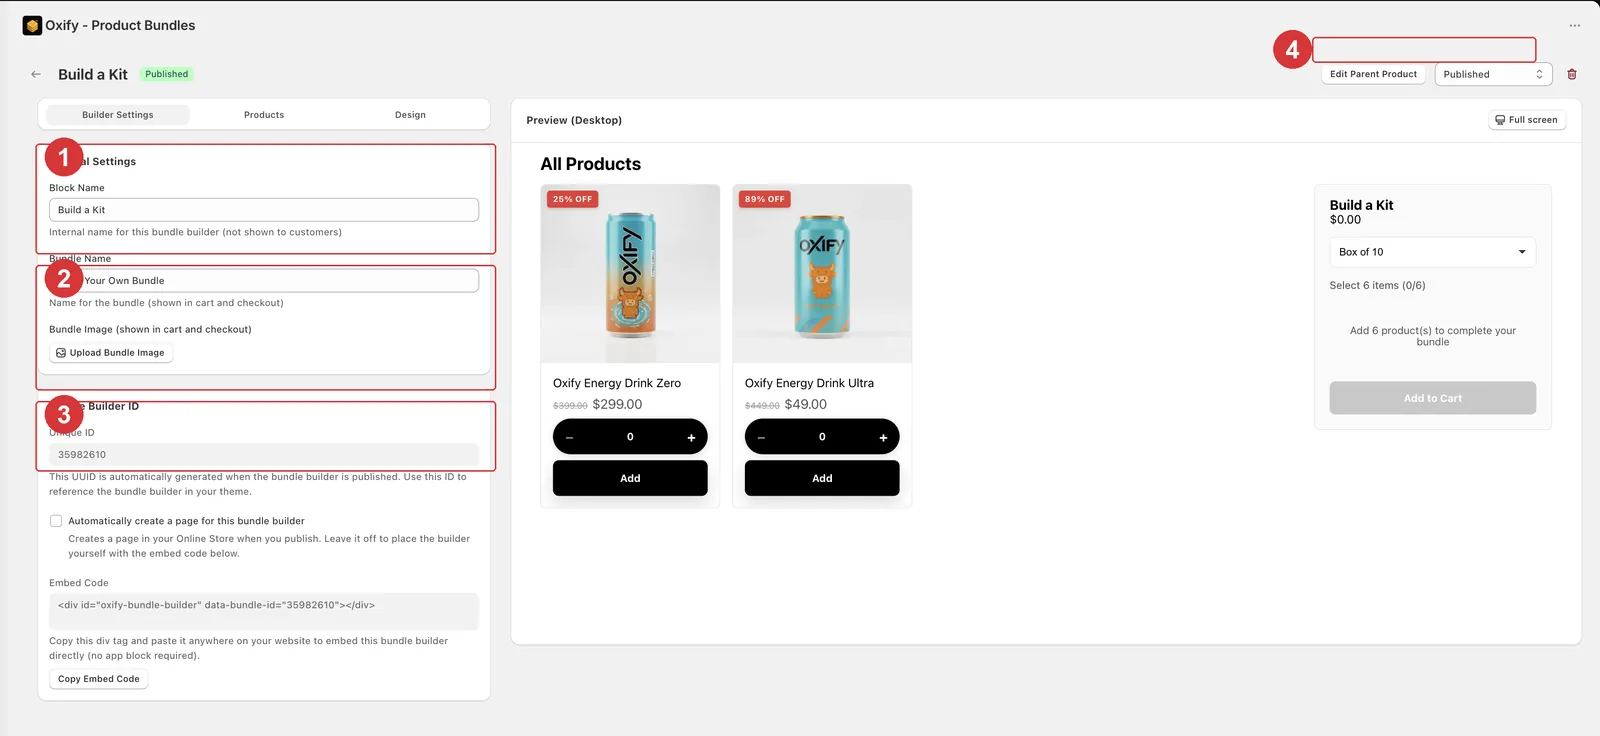
The Builder Settings tab: 1 naming, 2 the Unique ID and auto-page option, 3 the embed code, 4 the status dropdown in the header. The live preview on the right updates as you type.
On the Builder Settings tab:
Block Name — your internal reference, for example Gift box builder. Customers never see this.
Bundle Name — what shows in the cart and at checkout, for example Build Your Own Gift Box.
Bundle Image — optional. Upload an image to represent the bundle in the cart.
3. Set your box sizes
Go to the Products tab.
Leave Enable quantity as an option switched on.
Set the first box: Title Box of 6, Quantity 6, Discount Type % Off, Discount (%) 10.
Click Add Option and set a second: Title Box of 10, Quantity 10, Discount Type % Off, Discount (%) 15.
See Box sizes and discounts for all the options.
4. Add your product categories
Still on the Products tab, click Add Category.
Name it — for example Candles — then click Create category and select products.
Pick your products in the Shopify product picker.
Click Add Category again and repeat for a second category, Soaps.
5. Choose a look
Go to the Design tab.
In Sidebar Widget, pick a template: List Sidebar, Grid Sidebar, or Buy Box.
In Product Card Template, pick a card template and set Cards Per Row.
Check the live preview on the right.
6. Publish
Check the status dropdown in the editor header — a new builder is already set to Published.
Click Save in the save bar. The badge shows a green Published.
Publishing also generates the builder's Unique ID and, if you left the option on, creates its page in your Online Store.